Windows11の標準ソフト・ペイントを使用して写真や画像などにモザイクをかける方法を紹介します。
写真や画像などにモザイクをかける機会があると思います。でもどんなアプリを使ってよいか悩んでしまいますよね。
標準ソフトで可能なのですぐにモザイクかけることができます。
 panda
panda標準ソフトのペイントでモザイクかけれるのは嬉しいですね。インストール不要で楽です😊
ペイントでモザイクをかける方法をYoutubeへアップしています。
目次
モザイクをかける
標準ソフトのペイントを使ってモザイクかけることが可能です。
使い方はとても簡単なのですぐに覚えられると思います。
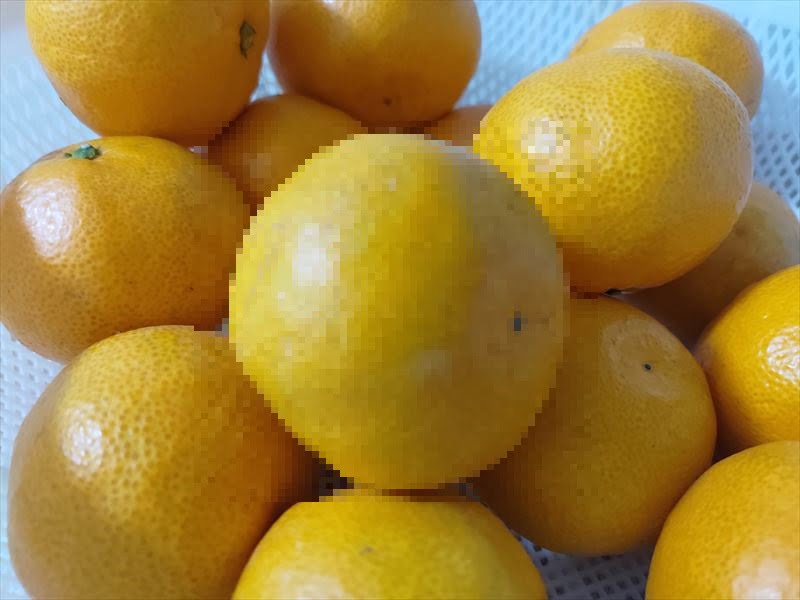
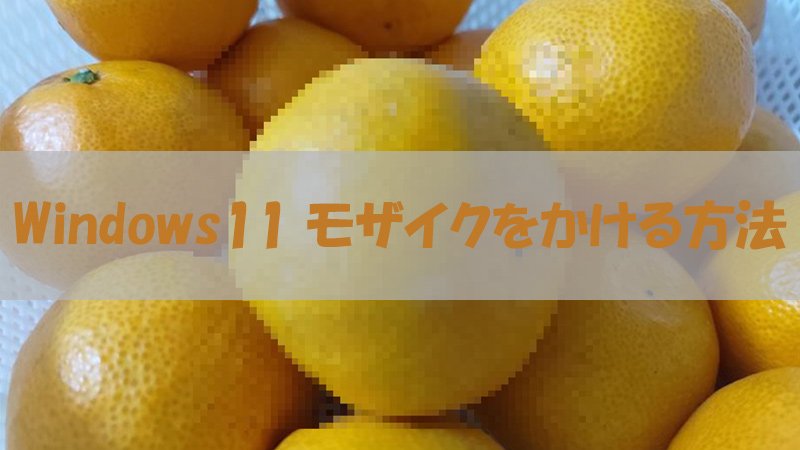
上記のようにモザイクをかけるのが目標です。それでは見ていきましょう。
ペイントでモザイク
STEP
1.ペイントでモザイク
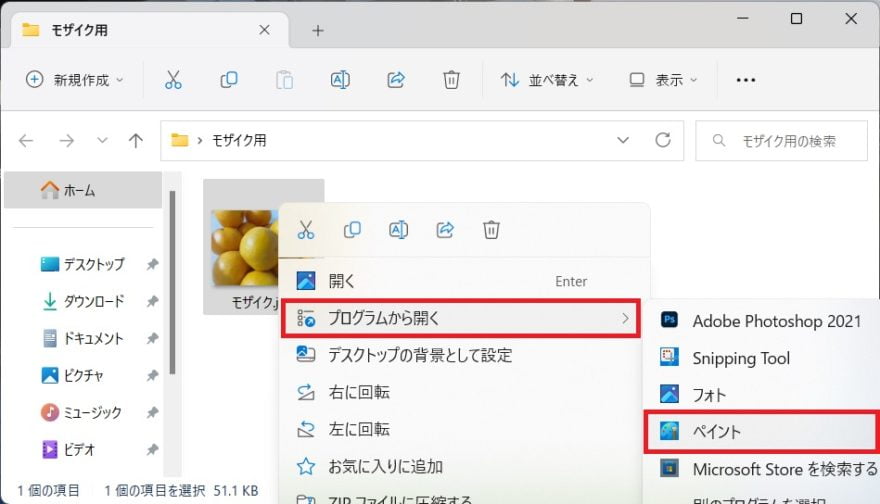
- 対象の画像で右クリックします。
- 次にプログラムから開くからペイントをクリックします。
STEP
2.ペイントでモザイク
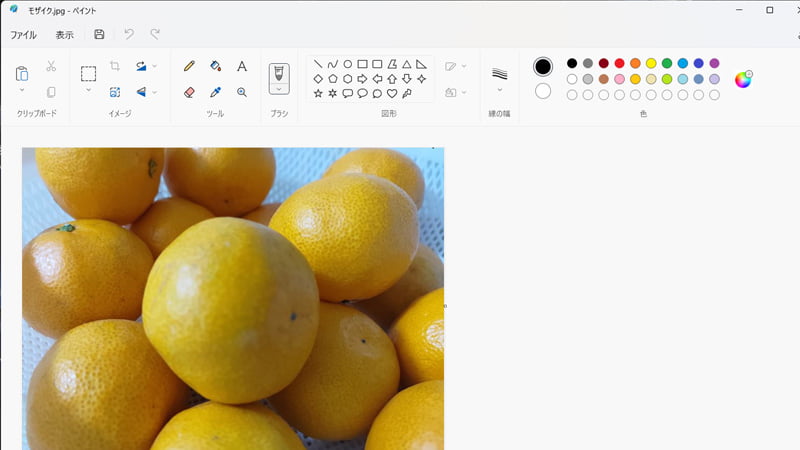
- ペイントの写真編集画面が起動します。
STEP
3.ペイントでモザイク
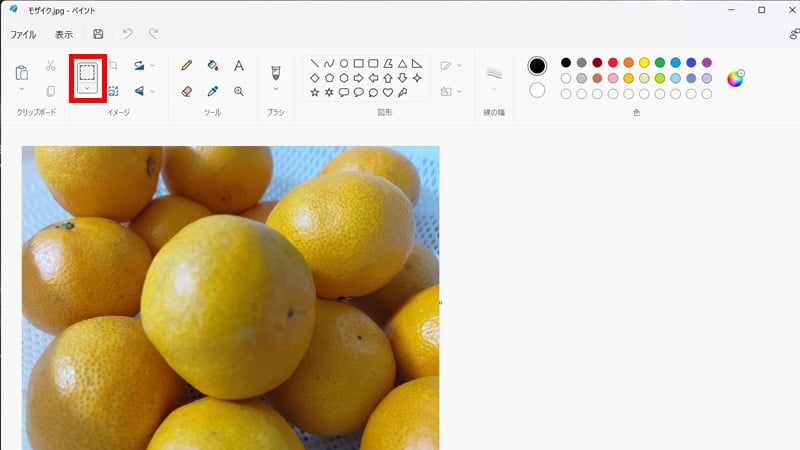
- ツールの「切り取り」をクリックします。
STEP
4.ペイントでモザイク
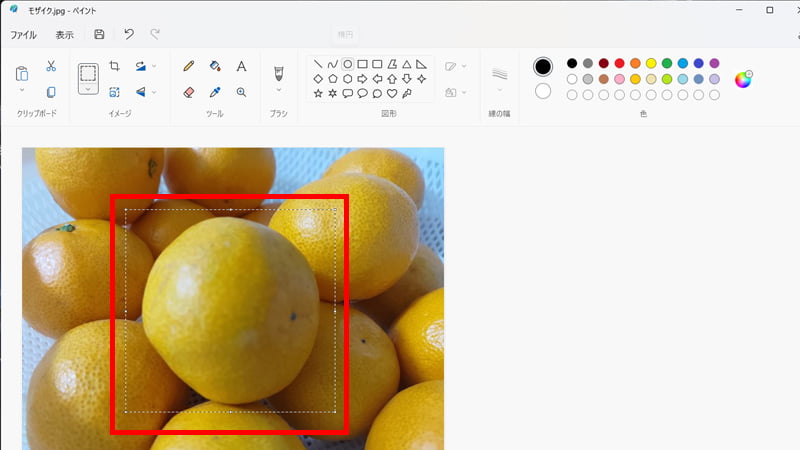
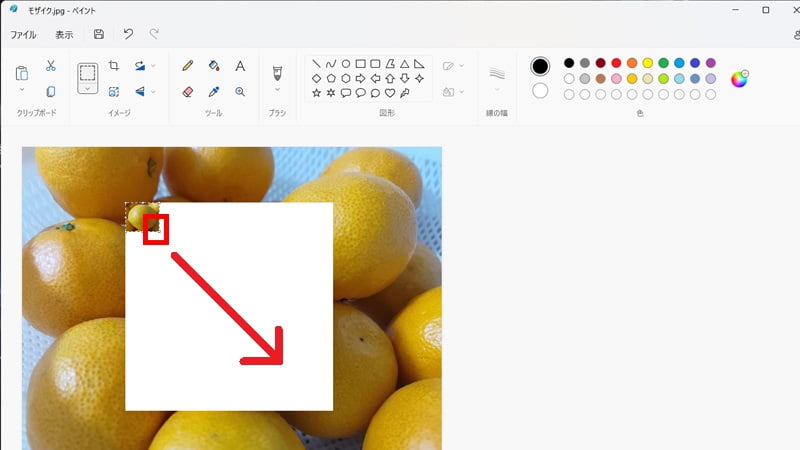
- モザイクをかけたい範囲を指定します。
STEP
スポンサーリンク
STEP
5.ペイントでモザイク
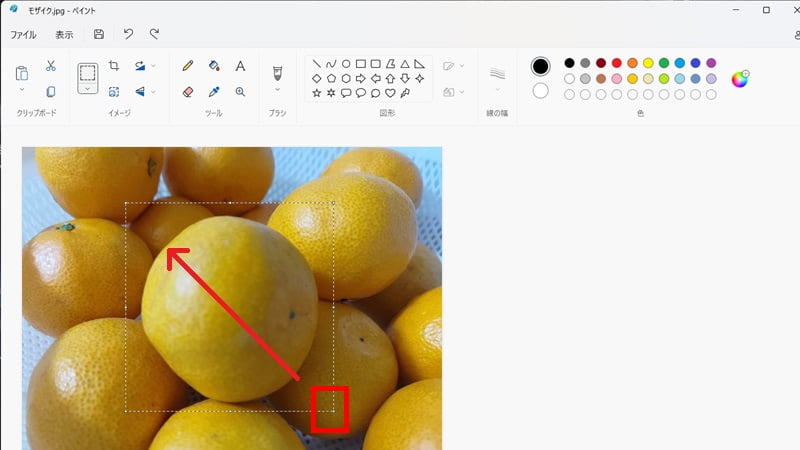
- モザイクの範囲指定した端をドラッグしながら小さくします。
STEP
6.ペイントでモザイク
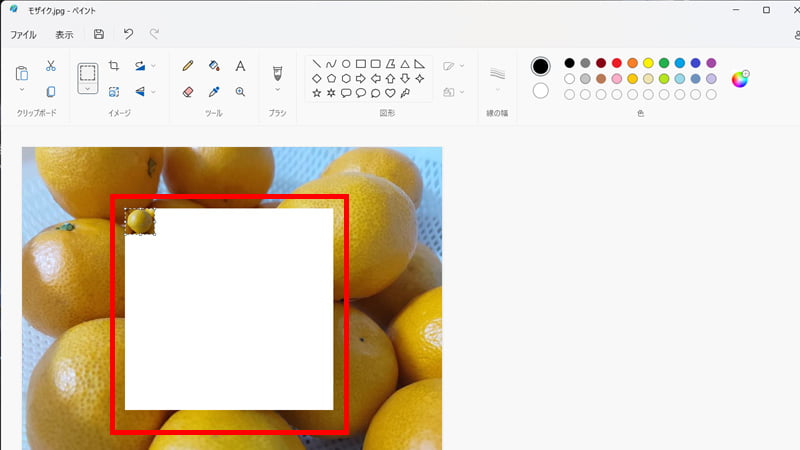
- 写真の端をドラッグしたままドロップします。
STEP
7.ペイントでモザイク
- 再度、写真の端をドラッグします。
STEP
8.ペイントでモザイク

- 写真の端をドロップします。
※ドロップする時に少し大きめにドロップすると綺麗モザイク可能です。
pandaペイントの操作を覚えると1~2分で簡単にモザイク可能ですね👍